Reverse Tie-Dye Flannel
 Reverse Tie-Dye Flannel
By Jess Galvan, Local Artist, Creator & Goodwill Treasure Hunter
What I said to my teenage daughter after she explains why she wants a 65-dollar reverse tie-dye hoodie: “I’m not sure if you know this or not but reverse tie-dye is really just putting bleach on there. We could do that for like two dollars.” If this trend had been in when I was a pre-teen learning how to do laundry, I would have been the trendiest little witch in Carbondale Kansas.
My daughter: *insert rolling eyes emoji*
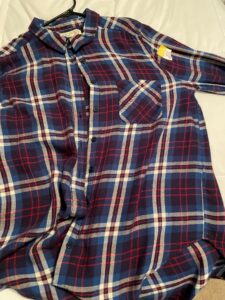
 Out of spite and a tiny desire to wear something on trend, I grabbed a flannel out my closet that I picked up at Goodwill months ago when it was on half-off. Even though it was 102 degrees out that day, who cares? It was cheap! Then I got my bottle of bleach/water mixture and a plastic trash bag, and out to the driveway I went.
This “flannel” is not a true flannel, in that it’s not cotton, but 100% rayon. The reason I like rayon is that it’s sort of… What’s the word? Floppy? Flowy? I don’t know, its not stiff and it’s lighter than a true flannel. Which I need because I’m in fall mode when Nebraska thinks 90 is still appropriate in the forecast.
My intention when I started this was to do an ombre bleach effect. After a tiny test spray in the direct sunlight, I realized that rayon bleaches VERY fast. This information led me to a different design because I couldn’t take the kind of pressure and timing it would have required to do an ombre.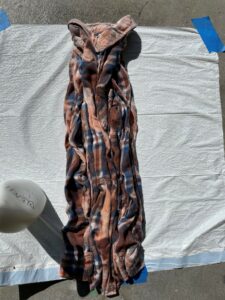
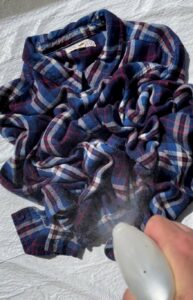
 I laid my trash bag out in the sun and placed the fully buttoned shirt flat on the bag face up. Then started to scrunch it all together. No real pattern just scrunched it all toward the center. After spraying the entire thing, I used my hands and scrunched more to get the bleach into the fabric a bit more, repeating this a couple times. After about 10 minutes, the bleach had done its job quite well, so I flipped the shirt over and did the same process. During the 10-15 minutes of time I was waiting for the bleach to work, I opened the shirt up some to see if the pattern was to my liking, and on the back side I made a couple of adjustments to get bleach on parts that seemed lacking. When it was done, I grabbed the corners of the trash bag to carry the shirt inside. I have a history of messing up at least one thing in our house when doing even the smallest project, so I planned for it this time! Into the kitchen sink for a quick rinse to stop the bleaching process, then the wash machine for a quick wash cycle.
After washing and drying, I decided to get some pictures. A few selfies first, but thinking I needed some a bit further away, I asked the person who is the literal worst at taking flattering photos. The same person who after every warp speed half attempt at a capture says, “Ugh, ok, is this good?” before you even see the blurry, head cut off but toes showing picture. Maybe you can skip that part, or maybe you too would like to have a fight with your husband. It’s up to you really.
Project time: 30-45 Min
Project cost: Approx. $2 (not including kitchen sink and washing machine)
Project list: Flannel shirt, spray bottle with 50/50 mix of bleach and water, trash bag, outdoor ventilated space, kitchen sink, washing machine.
Optional: Disgruntled husband
Instagram: jessgalvan8
TikTok: @jessgalvan8
Facebook: Jessica Galvan